Exporting from Blender to 3ds Max with Collision for Starfield
From Blender
- Build your mesh in Blender, and create the collision out of primitives, parent the collisions to the visible mesh
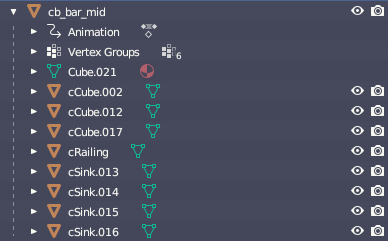
Mesh Hierarchy in Blender w/ Collision 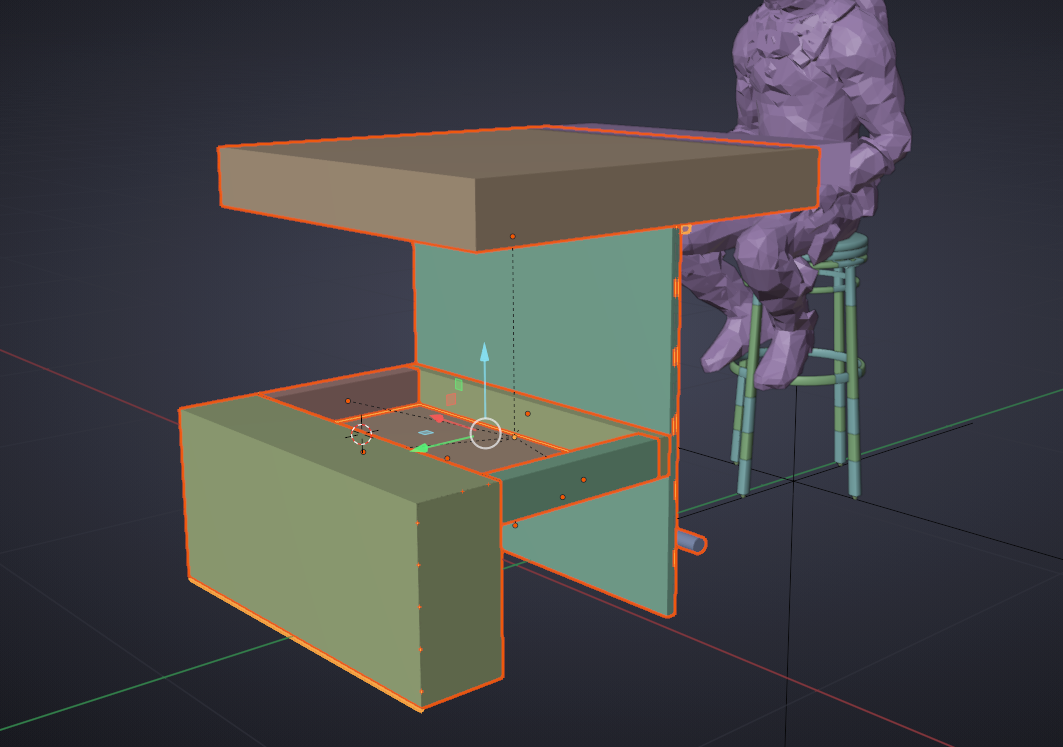
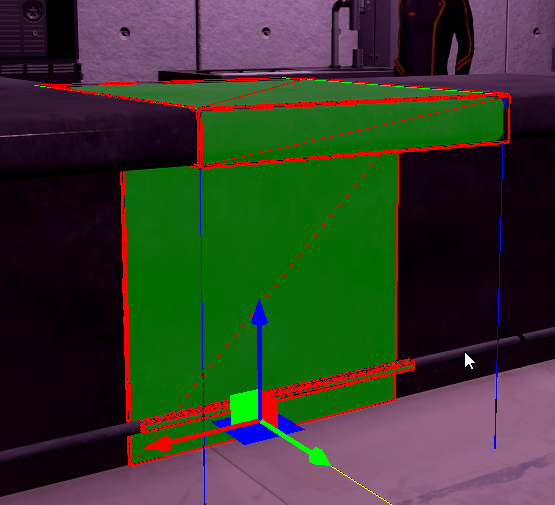
Mesh in Blender w/ Collision 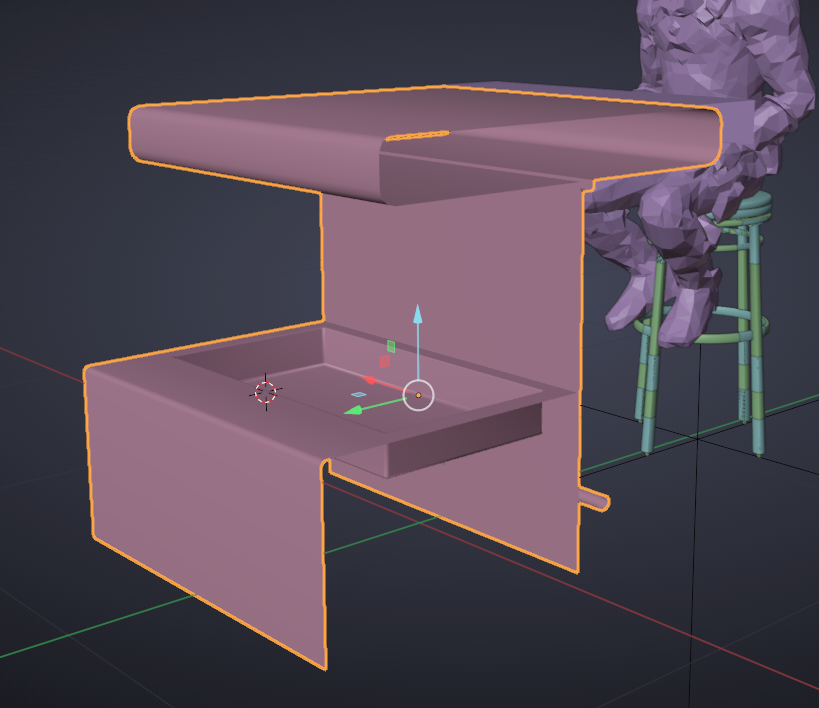
Mesh in Blender w/o Collision - Export as FBX, set scale to 1.0 if you're using cm in Blender, ensure Up is Z up and Forward is Y Forward
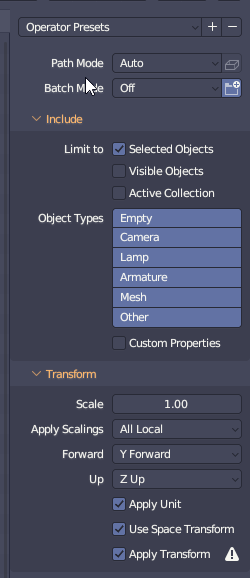
Blender Export Settings for 3ds Max - Import the fbx into 3ds Max 2021, if your units in max are set to cm, select automatic, otherwise adjust Units under Advanced Options
- Open the Bethesda FBX Export tool, and create a new export for your mesh
- Link the visible mesh you imported from Blender under the newly created empty in 3ds Max. Make sure to keep the collisions linked to the visible mesh, not the empty.
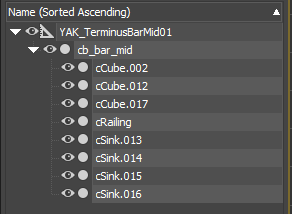
Mesh + Collision Hierarchy in 3ds Max
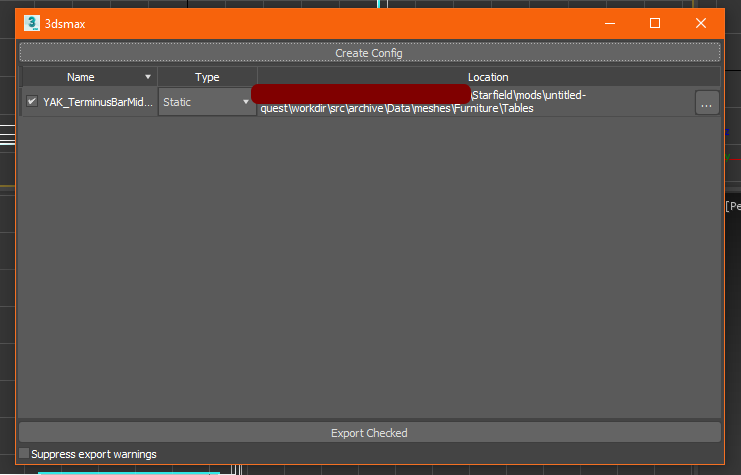
Assigning Material
- Open the Compact Material Editor in 3ds Max 1. Hit M and in the menu bar navigate to Modes --> Compact Material Editor
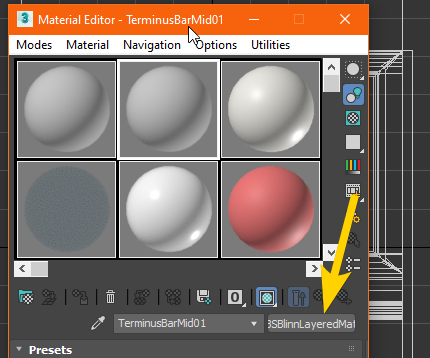
- Click one of the empty/default materials, give it a name and next to the name field click Physical Material and select BSBlinnLayeredMaterial
- Scroll to the bottom of the material where it says Please choose a .mat file by clicking on ... button and click on ...
- Navigate to your material in the Data folder of Starfield and click Open
- Now drag the material from the Material Editor onto your visible mesh. It may be easier to hide the collisions during this step
- This will tell the exporter to tell write to the exported FBX where the .mat file is located

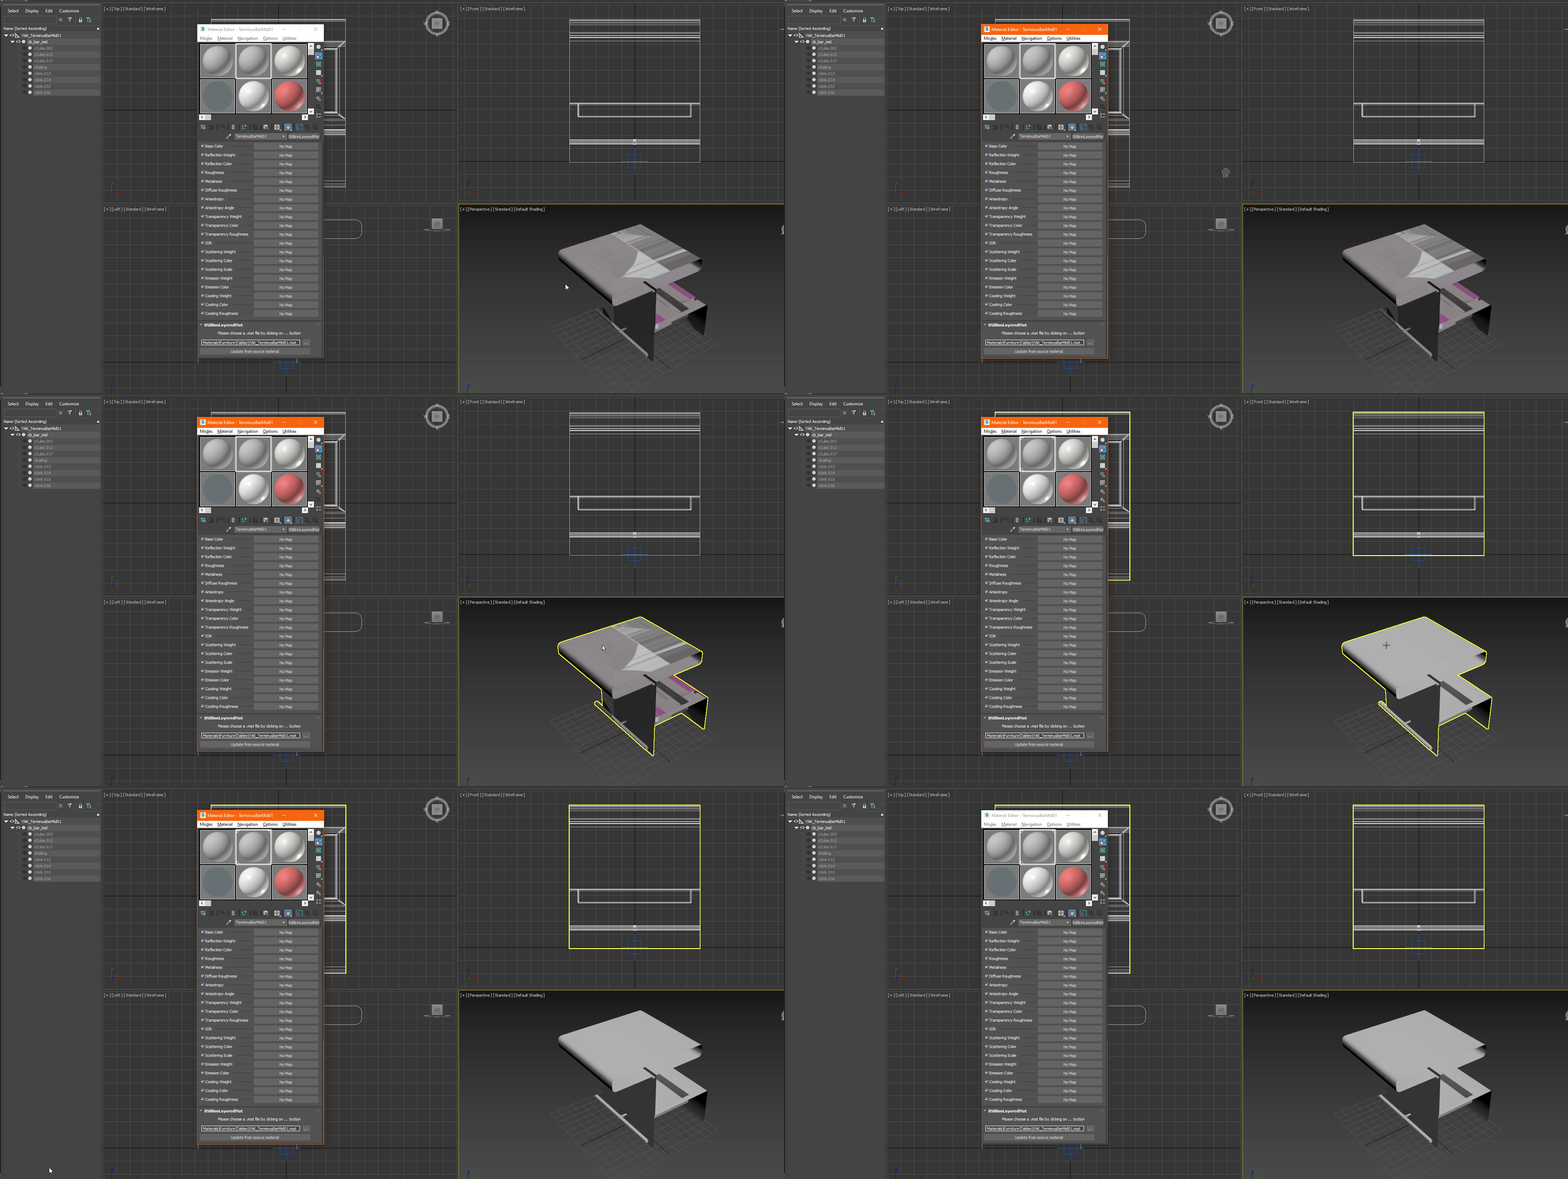
Building Collisions
- Now we need to add some Havok data to our visible mesh and its collisions
- Select the visible model and collision then Havok Content Tools --> Physics --> Create Rigid Body with Proxy(s)
- Ensure the scaling and origin for the visible model are correct
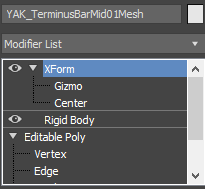
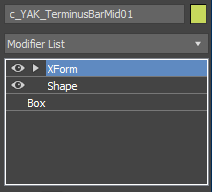
- Ensure there's a Rigid Body modifier on the visible model and a Havok Shape on the collision
- Reset XForms for both the visible model and collision
- The modifiers should look like this:
Collision Material
Lastly we need to apply the collision material to the collisions. This will tell the game what bullet holes will look like, and how it sounds when impacted.
-
First we'll need to reconfigure the Utilities to show Collision Groups
- Set Total Buttons to 9 (or if its not 8 already, just add one)
- Click Utilities and Edit button sets
- Under BGS Utility drag Collision Group to the empty utility, name the new set something specific and click Save then click OK
- Open the Collision Group utility
- Select your collision mesh you wish to apply the material to and set the material under Default Material and the Object Type
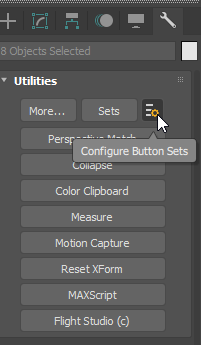
Configuring ButtonSets 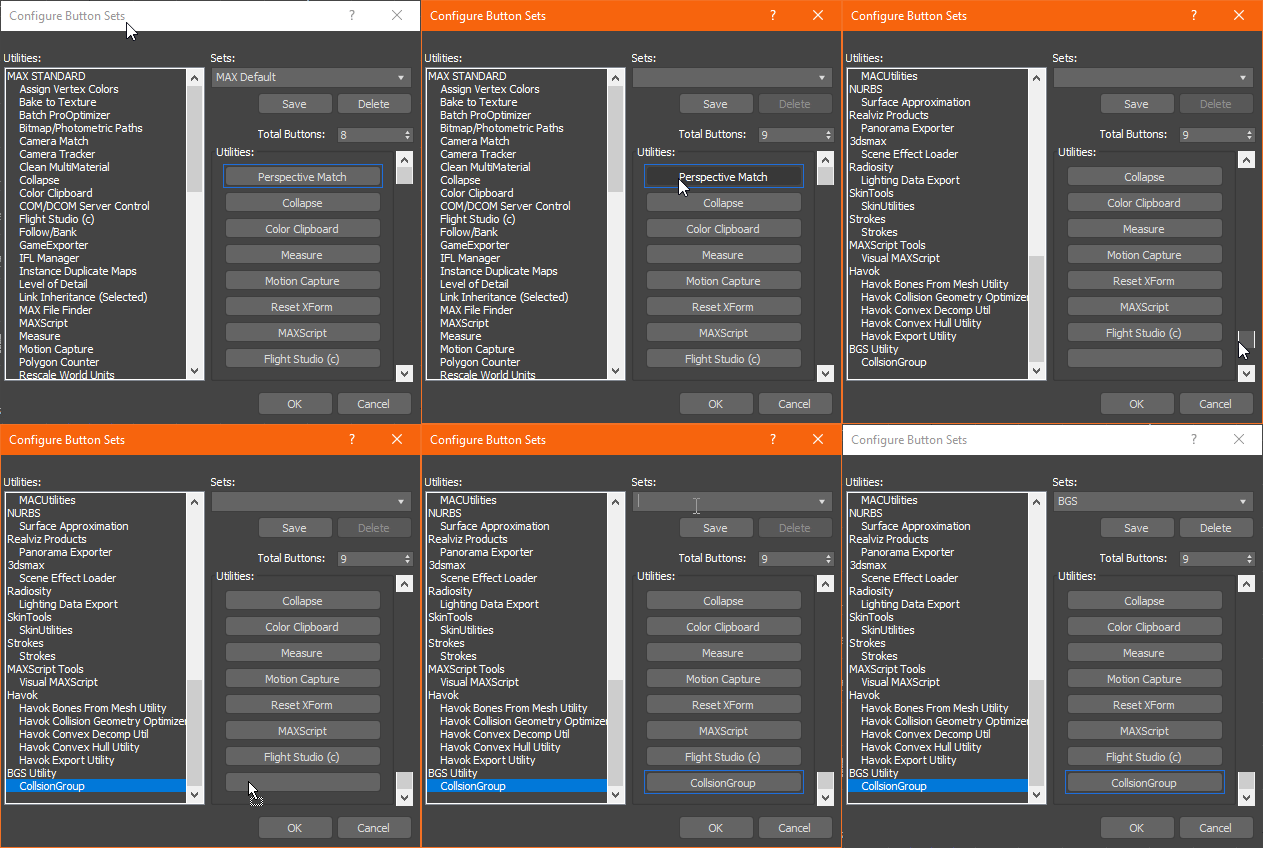
Adding the CollisionGroup 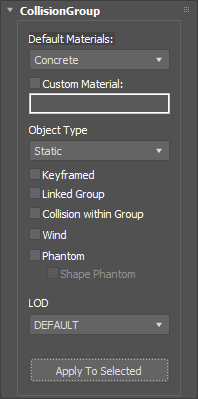
Collision Group Settings - Click Apply To Selected
Date: July 20, 2024